BIOS Diagnostics offers advanced health monitoring solutions, including blood pressure monitors. These devices aid in tracking cardiovascular health,
utilizing firmware for accurate readings and data interpretation, as seen in recent updates and research from February 5, 2024.
What are BIOS Diagnostics Blood Pressure Monitors?
BIOS Diagnostics blood pressure monitors are sophisticated medical devices designed for both home and professional use. They leverage oscillometric technology – a standard method for non-invasive blood pressure measurement – to provide accurate and reliable readings. Similar to the foundational role of BIOS in computer systems (as of February 5, 2024), these monitors serve as a crucial interface for assessing cardiovascular health.
These monitors aren’t simply about displaying numbers; they often incorporate features like irregular heartbeat detection, enhancing diagnostic capabilities. Updates, like those available through ASUS BIOS updates (August 18, 2025), demonstrate a commitment to continuous improvement and feature enhancements. The devices aim to empower users with the tools needed for proactive health management, mirroring the efficiency gains sought by AI tools like BIOS in biomedical research (August 14, 2025).
Importance of Accurate Blood Pressure Monitoring
Accurate blood pressure monitoring is paramount for proactive health management, much like a stable BIOS is crucial for computer functionality (February 5, 2024). Consistent and reliable readings allow for early detection of hypertension, a significant risk factor for heart disease, stroke, and kidney failure. Monitoring helps individuals and healthcare professionals track the effectiveness of lifestyle changes or medication regimens.
Just as updating a BIOS supports new hardware (August 18, 2025), regular monitoring adapts to evolving health needs. The precision of BIOS Diagnostics monitors, combined with diligent tracking, empowers informed decision-making. Ignoring fluctuations or relying on infrequent checks can delay critical interventions. Consistent data, similar to the data analyzed by AI tools (August 14, 2025), provides a comprehensive view of cardiovascular health, enabling timely and effective care.

Understanding Blood Pressure Basics
Blood pressure represents the force of blood against artery walls, essential for circulation. Like a computer’s BIOS managing core functions, it’s vital for overall health and well-being.
Systolic and Diastolic Pressure Explained
Systolic pressure, the top number in a reading, measures the force when your heart beats, pushing blood out. Think of it as the ‘peak’ pressure. Diastolic pressure, the bottom number, represents the force in your arteries between beats, when the heart rests – the ‘valley’ pressure.
Both values are crucial for assessing cardiovascular health. BIOS Diagnostics monitors accurately capture these measurements, similar to how a computer’s BIOS initializes core functions. Understanding these two numbers, and their relationship, is key to interpreting your blood pressure readings effectively. Regular monitoring, facilitated by devices like those from BIOS Diagnostics, provides valuable data for tracking changes and maintaining optimal health, mirroring the diagnostic capabilities of advanced systems.
Normal, Elevated, and High Blood Pressure Ranges
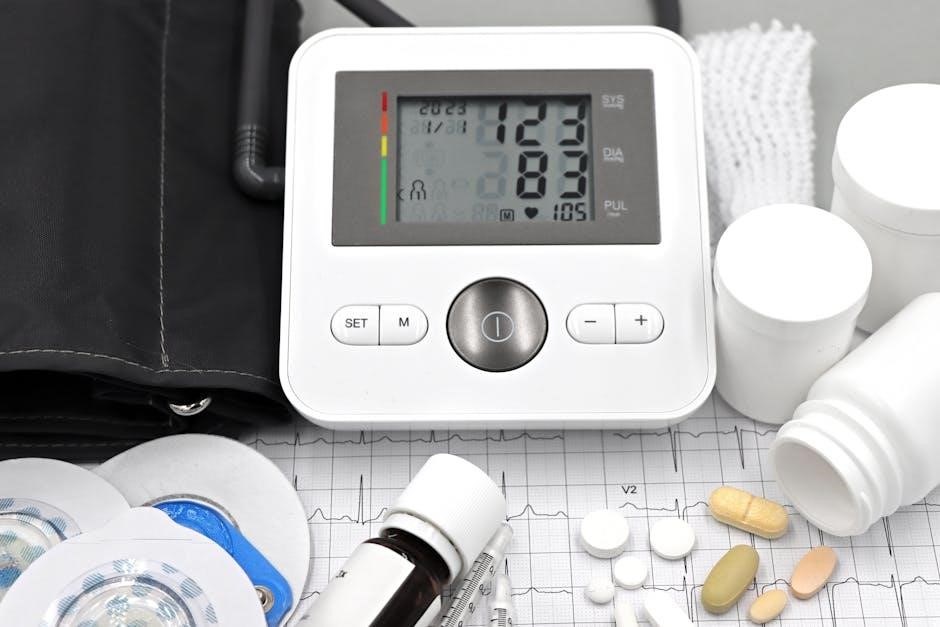
Blood pressure categories, as tracked by BIOS Diagnostics monitors, are vital for health assessment. Normal pressure is generally considered below 120/80 mmHg. Elevated readings fall between 120-129 systolic and less than 80 diastolic.
High Blood Pressure (Hypertension) is categorized as 130/80 mmHg or higher. Consistent monitoring, like utilizing a BIOS Diagnostics device, helps identify trends. These ranges, similar to system diagnostics, provide crucial data. Regular checks, and understanding these classifications, empower proactive health management. Remember to consult a healthcare professional for personalized interpretation and guidance based on your individual readings and health history.

Key Features of BIOS Diagnostics Monitors
BIOS Diagnostics monitors utilize advanced oscillometric technology for precise measurements and often include irregular heartbeat detection, enhancing cardiovascular health insights and data accuracy.
Oscillometric Measurement Technology
BIOS Diagnostics blood pressure monitors employ oscillometric technology, a non-invasive method for determining blood pressure. This technique involves inflating a cuff around the upper arm and then gradually releasing the pressure while detecting oscillations in the arterial pressure. These oscillations are analyzed by the monitor’s internal algorithms to calculate both systolic and diastolic blood pressure values.
Unlike older, manual methods, oscillometric technology offers convenience and ease of use. The system automatically determines the cuff inflation and deflation rates, minimizing user error. Modern BIOS monitors refine this process with advanced signal processing, improving accuracy and reliability. This technology is a cornerstone of home blood pressure monitoring, enabling individuals to proactively manage their cardiovascular health, as evidenced by ongoing firmware improvements and research.
Irregular Heartbeat Detection
BIOS Diagnostics blood pressure monitors are equipped with irregular heartbeat (IHB) detection capabilities. During a blood pressure measurement, the device continuously monitors and analyzes the heart’s rhythm. If an irregular heartbeat is detected, the monitor will display a symbol or indicator alerting the user to the anomaly.
This feature doesn’t diagnose arrhythmias but serves as an early warning signal, prompting individuals to consult with a healthcare professional. The IHB detection relies on sophisticated algorithms that identify deviations from a regular pulse pattern. It’s crucial to remember that occasional irregular beats can be normal, but persistent detection warrants medical attention. This proactive health monitoring aligns with the device’s overall goal of empowering users to manage their well-being, mirroring advancements in biomedical AI tools like BIOS.

Setting Up Your BIOS Monitor
BIOS Diagnostics monitors require proper setup for accurate readings. This includes installing batteries and correctly powering on the device, ensuring optimal functionality and reliable data.
Battery Installation and Powering On
BIOS Diagnostics blood pressure monitors typically require standard AA or AAA batteries for operation. Locate the battery compartment, usually on the back or bottom of the device, and open it according to the manual’s instructions. Insert the batteries, ensuring correct polarity (+ and -) as indicated inside the compartment.
Once the batteries are securely in place, close the compartment. To power on the monitor, press the ‘Start’ or ‘Power’ button. The display should illuminate, potentially showing a self-test sequence or a welcome message. If the display doesn’t activate, double-check the battery installation and consider replacing the batteries with fresh ones. Proper battery installation is crucial for accurate measurements and reliable performance.
Cuff Placement and Proper Technique
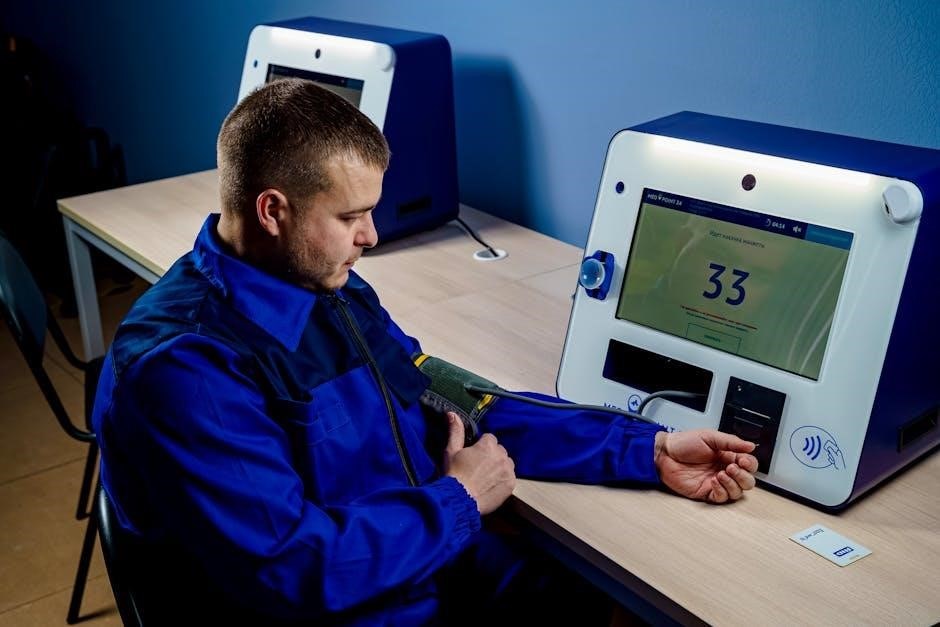
BIOS Diagnostics monitors require correct cuff placement for accurate readings. Position the cuff on your upper arm, approximately one inch above the elbow. Ensure the artery marker on the cuff aligns with your brachial artery. The cuff should be snug but not too tight – you should be able to slide one finger underneath the edge.
Sit comfortably with your back supported and feet flat on the floor. Avoid crossing your legs or talking during the measurement; Keep your arm relaxed and at heart level. Incorrect positioning, like a dangling arm or constricted clothing, can significantly affect results. Follow these guidelines for consistent and reliable blood pressure monitoring.
Taking Accurate Blood Pressure Readings
BIOS Diagnostics monitors deliver precise measurements when used correctly. Follow the step-by-step guide in the manual, ensuring a relaxed posture and proper cuff placement for optimal results.
Step-by-Step Measurement Guide
Preparation: Ensure five minutes of quiet rest before measurement. Sit comfortably with your back supported and feet flat on the floor. Avoid caffeine, smoking, and exercise for at least 30 minutes prior.
Cuff Application: Apply the cuff snugly to your upper arm, positioning it about one inch above your elbow. The artery marker on the cuff should align with your brachial artery.
Measurement Process: Press the ‘Start’ button. Remain still and silent during inflation and deflation. Avoid talking or moving. The monitor will automatically inflate and deflate the cuff, displaying your systolic and diastolic readings, along with your pulse rate.
Multiple Readings: Take two or three readings, spaced a few minutes apart, and record the average for a more accurate assessment. Refer to the manual for specific instructions related to your BIOS Diagnostics model.
Minimizing Measurement Errors
Proper Positioning: Maintain a relaxed, seated posture with your arm supported at heart level. Avoid crossing your legs or speaking during measurement. Incorrect positioning significantly impacts accuracy.
Cuff Size: Utilize the correct cuff size for your arm circumference. An ill-fitting cuff yields unreliable results. Consult the manual for sizing guidelines.
External Factors: Minimize distractions and ensure a quiet environment. Avoid caffeine, smoking, and exercise for 30 minutes before testing.
Device Calibration: Periodically verify the monitor’s accuracy against a calibrated device, as recommended in the BIOS Diagnostics manual. Consistent monitoring and adherence to these guidelines enhance result reliability.

Interpreting Your Results
BIOS Diagnostics monitors display systolic, diastolic readings, and pulse rate. Refer to the manual for symbol definitions and understand normal ranges for accurate health assessment.
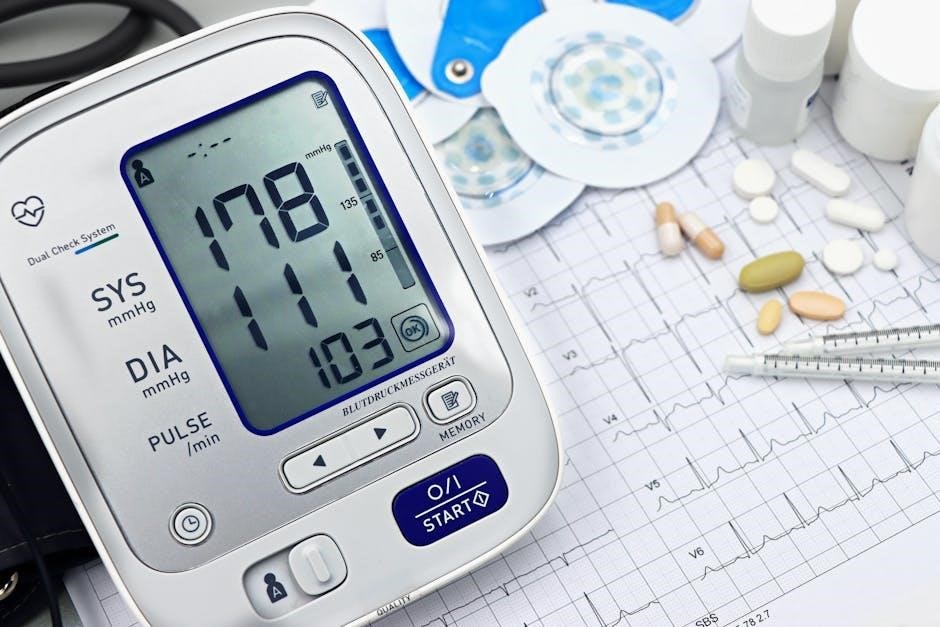
Understanding the Display Symbols
BIOS Diagnostics blood pressure monitors utilize a variety of display symbols to convey crucial information about your readings. A heart symbol typically indicates pulse rate, measured in beats per minute. Symbols representing systolic and diastolic pressure are clearly marked, often with “SYS” and “DIA” respectively.
An “Err” or similar message signifies an error during measurement – consult the troubleshooting section of the manual. A battery symbol displays remaining power levels. Some models feature symbols for irregular heartbeat detection, alerting users to potential arrhythmias. The manual provides a comprehensive key to all symbols, ensuring accurate interpretation of your blood pressure data. Familiarizing yourself with these indicators is vital for effective self-monitoring and informed healthcare discussions.
Recording and Tracking Blood Pressure Data
BIOS Diagnostics monitors facilitate consistent blood pressure tracking for effective health management. Regularly recording your systolic, diastolic, and pulse rate readings is crucial. Many models feature internal memory to store historical data, accessible via the device or downloadable to a computer.
Maintain a dedicated logbook or utilize a digital spreadsheet to note readings alongside date, time, and any relevant factors like medication or stress levels. Consistent tracking reveals trends, aiding in identifying potential issues; Share this data with your healthcare provider during appointments for informed decision-making. The manual details specific data storage and retrieval procedures for your model.

Troubleshooting Common Issues
BIOS Diagnostics monitors may display error messages or fail to power on. Consult the manual for specific codes and solutions, ensuring proper battery installation and cuff connection.
Error Messages and Their Meanings
BIOS Diagnostics blood pressure monitors utilize error codes to indicate specific issues. “Err 1” often signals a cuff connection problem – ensure the tubing is securely attached. “Err 2” may indicate irregular heartbeat detection, prompting a re-test in a relaxed state.
If the display shows “Err 3”, it could mean excessive movement occurred during measurement; remain still during readings. A consistent “Err 4” suggests low battery power – replace the batteries immediately.
Consult the full manual for a comprehensive list. Ignoring error messages can lead to inaccurate readings. Always refer to the manual’s troubleshooting section before contacting customer support, as many issues have simple solutions outlined within.
Device Not Powering On or Displaying Readings
If your BIOS Diagnostics monitor fails to power on, first verify battery installation, ensuring correct polarity. Replace batteries with fresh ones, even if the existing ones show some charge. Check the power adapter connection if applicable.
If the device powers on but displays no readings, confirm the cuff is properly connected to the monitor. A loose connection is a common cause. Ensure the cuff isn’t damaged or leaking air.
Refer to the manual’s troubleshooting section for a reset procedure. If issues persist, contact customer support, providing the model number and a detailed description of the problem.

Maintaining Your BIOS Monitor
BIOS Diagnostics monitors require gentle cleaning with a damp cloth; avoid harsh chemicals. Store the device in a cool, dry place, and replace batteries per guidelines.
Cleaning and Storage Instructions
Maintaining cleanliness is crucial for accurate readings and extending the lifespan of your BIOS Diagnostics blood pressure monitor. Always disconnect the cuff and power source before cleaning. Gently wipe the monitor’s surface and cuff with a soft, slightly damp cloth. Avoid using harsh chemicals, abrasive cleaners, or excessive water, as these can damage the device.
For storage, keep your monitor in a cool, dry place, away from direct sunlight and extreme temperatures. Avoid storing it in humid environments. Ensure the cuff is loosely coiled and not tightly bent or creased. Proper storage protects the sensitive components and ensures reliable performance when you need it. Regularly check battery compartments for corrosion.
Battery Replacement Guidelines
BIOS Diagnostics monitors utilize batteries to retain memory and ensure functionality. When the low battery indicator appears on the display, promptly replace the batteries. Use only the specified type of batteries (typically AAA or AA, check your model’s manual). Incorrect battery types can damage the device.
To replace, gently open the battery compartment (usually located on the back or bottom of the monitor). Remove the old batteries and insert the new ones, ensuring correct polarity (+ and -). Close the compartment securely. Dispose of used batteries responsibly, following local regulations. Regular battery checks contribute to consistent and reliable blood pressure measurements.